Spring boot로 파일 업로드 및 다운로드
✒️ 2025-05-28 13:23 내용 수정
- 참고 자료 : Spring Uploading Files
- 공식 문서를 참고하여 Spring boot로 파일을 업로드/다운로드 하는 방법을 정리하였다.
- Spring boot 설정, Spring boot#프로젝트 구성으로 Spring boot 설치 및 프로젝트 구성을 먼저 진행한다.
- 공식 문서 예시대로 진행하기 위해
Spring Web과Thymeleaf의존성을 설치한다.
- 공식 문서 예시대로 진행하기 위해
- Servlet container로 파일을 업로드할 때
MultipartConfigElement클래스가 필요한데, 이는 Spring boot에서 자동으로 설정된다.- Servlet#Servlet Container 참고.
- Spring에서의 파일 업로드 설정하기 참고.
- Spring MVC 자동 설정으로 인해 Spring boot는
MultipartConfigElementbean을 생성하고 파일 업로드를 준비하도록 만든다.
- 서버 체크리스트 프로젝트에서 테스트를 진행해서 패키지 및 클래스 위치가 프로젝트 상의 경로로 표시되어 있다.
1. 예외 클래스 생성
- 아래의 예외 클래스들을 통해 파일을 저장하거나 불러올 때 파일이 없는 경우의 예외 처리를 따로 관리하기 위해 만든 것 같았다.
StorageExceptionRuntimeException을 상속 받은 클래스로, 파일 저장과 연관된 예외 처리를 관리한다.- RuntimeException은 Java Virtual Machine의 일반 동작 중에 처리될 수 있는 예외들의 상위 클래스이다.
- RuntimeException과 그 하위 클래스들은 체크되지 않은 예외로(unchecked exceptions), 이는 메소드나 생성자 실행 중에 발생할 수 있으며, 메소드나 생성자 경계에서 외부로 전파될 수 있다면 메소드나 생성자의
throws절에 해당 예외를 선언되지 않아도 된다.
RuntimeException is the superclass of those exceptions that can be thrown during the normal operation of the Java Virtual Machine.
RuntimeException and its subclasses are unchecked exceptions. Unchecked exceptions do not need to be declared in a method or constructor's throws clause if they can be thrown by the execution of the method or constructor and propagate outside the method or constructor boundary.
public class StorageException extends RuntimeException {
    public StorageException(String message) {
        super(message);
    }

    public StorageException(String message, Throwable cause) {
        super(message, cause);
    }
}
StorageFileNotFoundException- 저장소에 파일이 발견되지 않을 때, 또는 읽을 수 없을 때 예외를 관리하는 클래스이며,
StorageException을 상속 받는다.
- 저장소에 파일이 발견되지 않을 때, 또는 읽을 수 없을 때 예외를 관리하는 클래스이며,
public class StorageFileNotFoundException extends StorageException{
    public StorageFileNotFoundException(String message) {
        super(message);
    }

    public StorageFileNotFoundException(String message, Throwable cause) {
        super(message, cause);
    }
}
2. Service 생성
StorageService- Controller가 저장 계층(파일 시스템과 같은 storage layer)과 상호 작용할 수 있도록 해주는 인터페이스이다.
package com.ase.serverckecklist;

import org.springframework.core.io.Resource;
import org.springframework.web.multipart.MultipartFile;

import java.nio.file.Path;
import java.util.stream.Stream;

public interface StorageService {
    void init();

    // 파일 저장
    void store(MultipartFile file);

    // 경로 전체 가져오기
    // Path : 경로 string을 다루는 인터페이스
    Stream<Path> loadAll();

    // 경로 가져오기
    Path load(String filename);

    // 파일 가져오기
    // Resource : 해당 자원이 물리적으로 실존하는지 결정하는 인터페이스
    Resource loadAsResource(String filename);

    // 전체 삭제하기
    void deleteAll();
}
StorageProperties
- 저장소의 특성(위치)을 저장한 클래스이다.
- 저장소는 테스트를 위해 프로젝트의
src/main/resources/디렉터리에uploadFiles라는 디렉터리를 새로 만들었으며, 저장소의 위치는 해당 폴더의 컴퓨터 내 절대 경로를 입력한다.- ex :
C:\\projectName\\src\\main\\resources\\uploadFiles 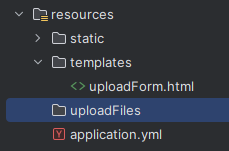
- ex :
@ConfigurationProperties: 외부 구성을 위한 Annotation으로, 클래스 정의나@COnfiguration클래스의@Bean메소드에 추가하여 외부 설정을 연결하고 유효한지 검증할 수 있다.- 즉 외부 구성 파일의 속성을 Spring boot의 어플리케이션 클래스에 바인딩하도록 설정할 수 있다.
@ConfigurationProperties("prefix")나@ConfigurationProperties("value")를 사용하여 대상 객체에 바인딩할 속성을 지정할 수 있다.
package com.ase.serverckecklist;

import org.springframework.boot.context.properties.ConfigurationProperties;

@ConfigurationProperties("storage")
public class StorageProperties {

    // 파일 저장소 위치
    // C:\\projectName\\src\\main\\resources\\uploadFiles 같은 형식으로 location을 설정
    private String location = "target-dir";

    public String getLocation() {
        return location;
    }

    public void setLocation(String location) {
        this.location = location;
    }
}
FileSystemStorageService- 파일 시스템을 관리하는 클래스로,
StorageService를 구현하고, 저장소 내에 파일을 업로드 및 불러오는 메소드 등을 가지고 있다.
- 파일 시스템을 관리하는 클래스로,
package com.ase.serverckecklist;

import org.springframework.beans.factory.annotation.Autowired;
import org.springframework.core.io.Resource;
import org.springframework.core.io.UrlResource;
import org.springframework.stereotype.Service;
import org.springframework.util.FileSystemUtils;
import org.springframework.web.multipart.MultipartFile;

import java.io.IOException;
import java.io.InputStream;
import java.net.MalformedURLException;
import java.nio.file.Files;
import java.nio.file.Path;
import java.nio.file.Paths;
import java.nio.file.StandardCopyOption;
import java.util.stream.Stream;

@Service
public class FileSystemStorageService implements StorageService{

    private final Path rootLocation;

    @Autowired
    public FileSystemStorageService(StorageProperties properties) {
        // 파일 저장소 위치 값이 없을 경우 예외 처리
        if (properties.getLocation().trim().length() == 0) {
            throw new StorageException("File upload location can not be Empty");
        }

        // 파일 root 경로를 StorageProperties에 저장된 location의 경로로 설정
        this.rootLocation = Paths.get(properties.getLocation());
    }

    // 최초 실행 시 파일의 디렉터리 설정
    @Override
    public void init() {
        try {
            // root 경로에 부모 디렉터리를 포함한 디렉터리들을 생성
            Files.createDirectories(rootLocation);
        } catch (IOException e) {
            // 저장소 생성 불가 시 예외처리
            throw new StorageException("Could not initialize storage", e);
        }

    }

    // 파일을 저장
    @Override
    public void store(MultipartFile file) {
        try {
            // 파일이 비어있는 경우 예외처리
            if (file.isEmpty()) {
                throw new StorageException("Failed to store empty file.");
            }

            // 인자로 받은 파일의 원본 이름으로 경로를 통해 경로 이름을 얻고,
            // 주어진 경로 string을 절대 경로 주소로 변환
            // 즉 새 파일이 오면 해당 파일의 저장소 위치를 저장한 객체를 생성함
            Path destinationFile = this.rootLocation.resolve(
                    Paths.get(file.getOriginalFilename()))
                    .normalize().toAbsolutePath();

            // -- 보안 검사용
            // 만약 대상 파일의 상위 경로가 저장소의 절대 경로와 다른 경우
            // 실제 저장하려는 위치와 다른 경로에 파일이 저장되지 않도록 설정
            if (!destinationFile.getParent().equals(this.rootLocation.toAbsolutePath())) {
                throw new StorageException("Cannot store file outside current directory.");
            }
            // 파일을 받아 미리 생성한 경로에 저장
            try (InputStream inputStream = file.getInputStream()) {
                Files.copy(inputStream, destinationFile, StandardCopyOption.REPLACE_EXISTING);
            }
        } catch (IOException e) { // 입력 에러 처리
            throw new StorageException("Failed to store file.", e);
        }
    }

    // 저장소에 저장된 파일 및 서브 디렉터리들의 상대 경로를 반환
    // /storage 내의 /storage/test1.txt 같은 파일의 경로를 `test1.txt`로 반환
    @Override
    public Stream<Path> loadAll() {
        try {
            // 시작 지점으로부터 최대 깊이가 1인 file tree를 탐색한 결과를 반환하고,
            // 그 중에서 루트 디렉터리 자체를 제외한 디렉터리 내 파일과 서브 디렉터리만 남긴 후,
            // 루트 디렉터리를 기준으로 한 파일 및 서브 디렉터리의 상대 경로를 반환함
            return Files.walk(this.rootLocation, 1)
                    .filter(path -> !path.equals(this.rootLocation))
                    .maprelativize;
        } catch (IOException e) {
            throw new StorageException("Failed to read sotred files.", e);
        }
    }

    // 인자로 받은 파일의 경로를 반환
    @Override
    public Path load(String filename) {
        return rootLocation.resolve(filename);
    }

    // 파일 이름으로 리소스 가져오기
    @Override
    public Resource loadAsResource(String filename) {
        try {
            // 파일 이름으로 파일 경로 가져오기
            Path file = load(filename);

            // 파일의 절대 경로 객체를 가진 URL 리소스 객체를 생성
            Resource resource = new UrlResource(file.toUri());

            // 리소스가 존재하거나 읽을 수 있는 겨우 리소스를 반환
            if (resource.exists() || resource.isReadable()) {
                return resource;
            } else { // 파일을 읽을 수 없는 경우 에러 처리
                throw new StorageFileNotFoundException("Could not read file: "+filename);
            }
        } catch (MalformedURLException e) {
            // 읽을 수 없는 파일의 에러 처리
            throw new StorageFileNotFoundException("Could not read file: "+filename, e);
        }
    }

    // 저장소에 등록된 파일들을 제거
    @Override
    public void deleteAll() {
        // FileSystemUtils : 파일 시스템과 같이 동작하는 유틸 메소드를 가진 추상 클래스
        // deleteRecursively : 인자로 받은 파일을 제거함
        // File toFile() : 해당 경로에 위치한 파일을 watch 서비스를 통해 등록함
        FileSystemUtils.deleteRecursively(rootLocation.toFile());
    }
}
3. 파일 업로드 용량 설정
src/main/resources/application.properties에서MultipartConfigElement의 속성을 조정할 수 있다.spring.servlet.multipart.max-file-size: 전체 파일의 용량 제한spring.servlet.multipart.max-request-size:multipart/form-data의 요청 사이즈 제한
spring.servlet.multipart.max-file-size=128KB
spring.servlet.multipart.max-request-size=128KB
yml형식이라면 아래와 같이 작성한다.
spring:
	servlet:
		multipart:
			max-file-size: 128KB
			max-request-size: 128KB
4. Controller 생성
- Service를 생성했으므로 이제 Controller에서 파일 업로드/읽기 요청을 처리할 메소드를 생성한다.
MvcUriComponentsBuilder: 파일을 다운로드할 수 있는 URI를 생성HttpHeaders.CONTENT_DISPOSITION: 브라우저가 서버에서 전송된 파일을 어떻게 처리할지 결정inline: 파일을 웹 브라우저에서 바로 열도록 설정attachment: 파일을 브라우저에서 다운로드하도록 설정
RedirectAttributes: 리다이렉트 동작을 할 때 사용하는Model중 하나
package com.ase.serverckecklist;

import com.ase.serverckecklist.storage.StorageFileNotFoundException;
import com.ase.serverckecklist.storage.StorageService;
import lombok.RequiredArgsConstructor;
import org.springframework.core.io.Resource;
import org.springframework.http.HttpHeaders;
import org.springframework.http.ResponseEntity;
import org.springframework.stereotype.Controller;
import org.springframework.ui.Model;
import org.springframework.web.bind.annotation.*;
import org.springframework.web.multipart.MultipartFile;
import org.springframework.web.servlet.mvc.method.annotation.MvcUriComponentsBuilder;
import org.springframework.web.servlet.mvc.support.RedirectAttributes;

import java.io.IOException;
import java.util.stream.Collectors;

@Controller
@RequiredArgsConstructor
public class FileUploadController {
    // controller from https://spring.io/guides/gs/uploading-files

    private final StorageService storageService;

    // GET
    // 파일 전체 가져오기 및 파일 다운로드
    @GetMapping("/")
    public String listUpoadedFiles(Model model) throws IOException {
        // Model을 사용하여 파일 정보를 같이 보내줌
        // MvcUriComponentsBuilder : 파일을 다운로드할 수 있는 URI를 생성
        model.addAttribute("files",
                storageService.loadAll().
                        map(path -> MvcUriComponentsBuilder.fromMethodName(
                                FileUploadController.class,
                                "serveFile", // 아래의 메소드를 통해 다운로드
                                path.getFileName().toString())
                                .build().toUri().toString())
                        .collect(Collectors.toList()));

        return "uploadForm";
    }

    // 특정 파일 다운로드하기
    @GetMapping("/files/{filename:.+}")
    @ResponseBody
    public ResponseEntity<Resource> serveFile(@PathVariable String filename) {
        Resource file = storageService.loadAsResource(filename);

        // 파일 이름과 일치하는 리소스가 없으면 파일을 못 찾는다는 응답을 반환
        if (file == null) {
            return ResponseEntity.notFound().build();
        }

        // 파일이 존재하면 HTTP 응답 헤더에 파일 다운로드 방식을 설정
        // CONTENT_DISPOSITION : 브라우저가 서버에서 전송된 파일을 어떻게 처리할지 결정
        // inline : 파일을 웹 브라우저에서 바로 열도록 설정
        // attachment : 파일을 브라우저에서 다운로드하도록 설정
        return ResponseEntity.ok().header(HttpHeaders.CONTENT_DISPOSITION,
                "attachment; filename=\"" + file.getFilename() + "\"").body(file);
    }

    // 파일 업로드
    @PostMapping("/")
    public String handleFileUpload(@RequestParam("file")MultipartFile file,
                                   RedirectAttributes redirectAttributes) {
        // 저장소에 파일 저장
        storageService.store(file);

        // 리다이렉트 시 메시지를 함께 첨부
        redirectAttributes.addFlashAttribute("message",
                "You successfully uploaded " + file.getOriginalFilename());

        return "redirect:/";
    }
    // 저장소에 파일이 없는 경우의 예외처리
    @ExceptionHandler(StorageFileNotFoundException.class)
    public ResponseEntity<?> handleStorageFileNotFound(StorageFileNotFoundException exc) {
        return ResponseEntity.notFound().build();
    }
}
5. HTML 생성
- 파일 동작 테스트를 위해
src/main/resources/templates/uploadForm.html파일을 생성하고, 페이지 코드를 작성한다.
<html xmlns:th="https://www.thymeleaf.org">
<body>

<!-- 만약 Model로부터 메시지가 왔다면 메시지를 출력 -->
<div th:if="${message}">
    <h2 th:text="${message}"/>
</div>

<div>
    <form method="POST" enctype="multipart/form-data" action="/">
        <table>
            <tr>
                <td>업로드할 파일 :</td>
                <td><input type="file" name="file" /></td>
            </tr>
            <tr>                <td></td>
                <td><input type="submit" value="Upload" /></td>
            </tr>
        </table>
    </form>
</div>

<div>
    <ul>
        <!-- Model로부터 받은 파일들을 다운로드 링크와 함께 출력 -->
        <li th:each="file : ${files}">
            <a th:href="${file}" th:text="${file}" />
        </li>
    </ul>
</div>

</body>
</html>
6. Application.java 업데이트
StoragePropertiesBean을 명시적으로 등록(@EnableConfigurationProperties)하여FileSystemStorageService가 사용할 수 있도록 설정한다.CommandLineRunner를 사용하여 어플리케이션 실행 시 테스트용 폴더를 삭제하고 다시 생성하도록 설정한다.
package com.ase.serverckecklist;

import com.ase.serverckecklist.storage.StorageProperties;
import com.ase.serverckecklist.storage.StorageService;
import org.springframework.boot.CommandLineRunner;
import org.springframework.boot.SpringApplication;
import org.springframework.boot.autoconfigure.SpringBootApplication;
import org.springframework.boot.context.properties.EnableConfigurationProperties;
import org.springframework.context.annotation.Bean;

@SpringBootApplication
@EnableConfigurationProperties(StorageProperties.class)
public class ServerckecklistApplication {

    public static void main(String[] args) {
       SpringApplication.run(ServerckecklistApplication.class, args);
    }

    @Bean
    CommandLineRunner init(StorageService storageService) {
       return (args) -> {
          storageService.deleteAll();
          storageService.init();
       };
    }
}
7. 업로드 및 다운로드 테스트
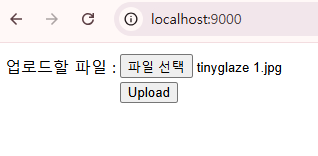
- 먼저 프로젝트를 실행하고 웹 브라우저에서 주소를 입력하여 접속한다.
- 화면이 정상적으로 뜨면 업로드할 파일을 선택한다.
- 업로드 버튼을 누르고 파일이 잘 업로드 되었는지 확인한다.
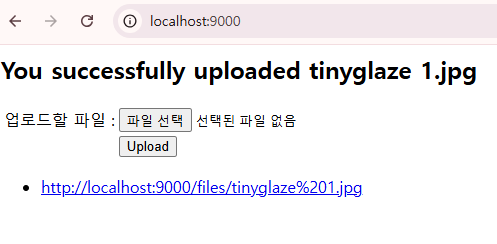
- 링크를 눌러 파일이 잘 다운로드 되고, 업로드했던 파일이 맞는지 확인한다.
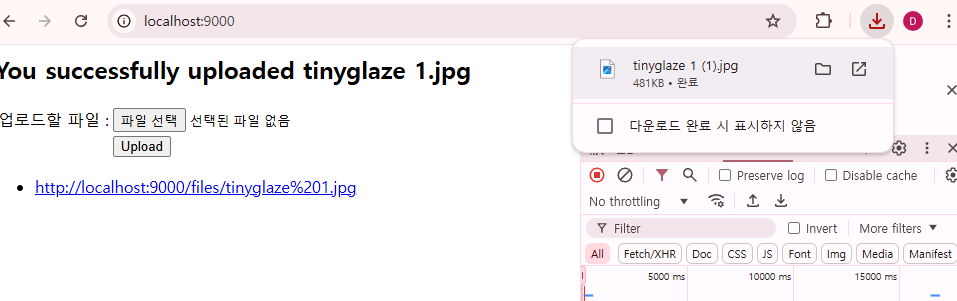
- 프로젝트의 저장소 위치에도 파일이 업로드 되어있는지 확인한다.
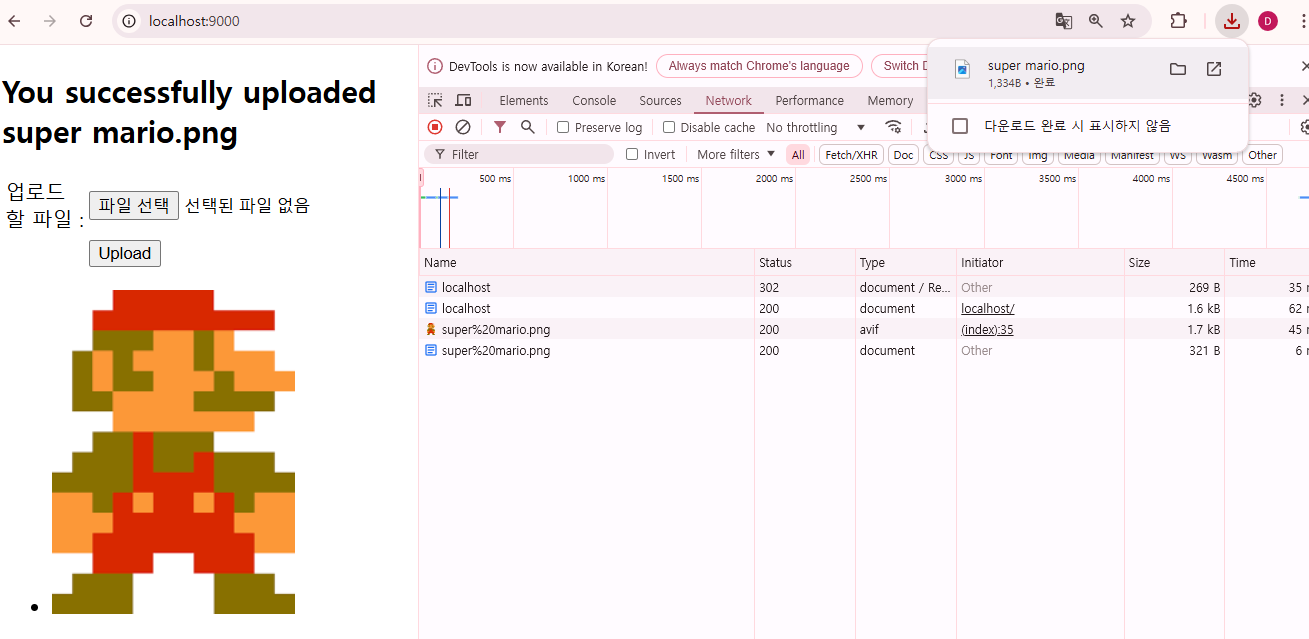
번외 - 화면에 이미지 출력하기
- 다운로드 링크도 좋지만 이미지 자체를 화면에 띄우는 것도 필요하여 코드를 조금 수정하였다.
uploadForm.html에서<a>대신<img>태그를 사용하여 이미지를 출력한다.- 여기서
<img>태그가 파일을 가져올 때 Request url을 통해 이미지를 요청하므로 다운로드 링크와 동일한 링크가 필요하다. 따라서 Thymeleaf의@{}를 사용하여<img>src 속성을 설정한다. - Thymeleaf 표현식과 문법#6. th attr, th attrappend, th attrprepend 참고.
- 여기서
<li th:each="file : ${files}">
    <img th:src="@{${file}}">
</li>
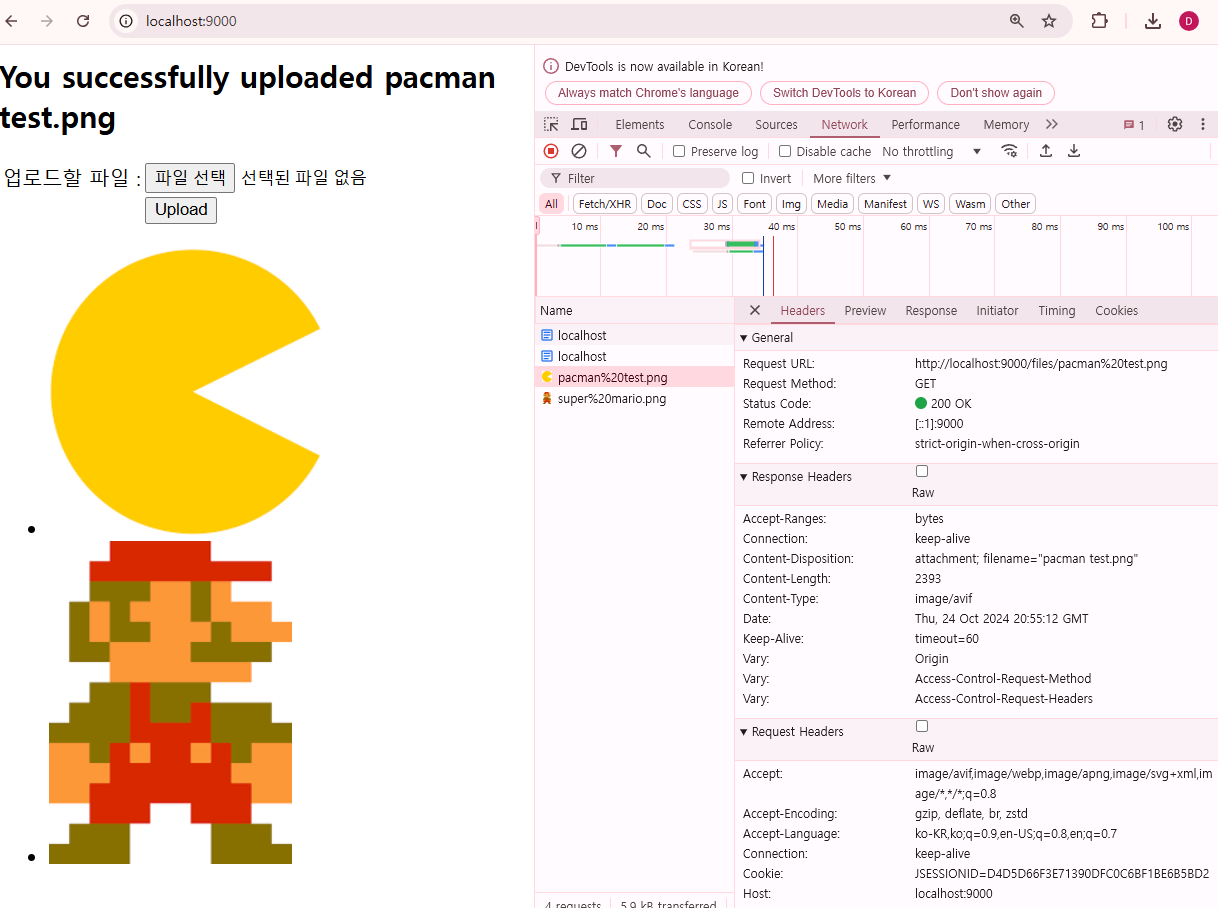
- HTML을 조금 수정해서 다운로드와 화면 출력 모두를 수행하도록 설정할 수 있다.
<a>태그와<img>태그를 모두 사용한다.
<div>
    <ul>
        <!-- Model로부터 받은 파일들을 다운로드 링크와 함께 출력 -->
        <li th:each="file : ${files}">
            <a th:href="${file}">
                <img th:src="@{${file}}">
            </a>
        </li>
    </ul>
</div>
파일 이름 UTF-8 인코딩 처리
- 20241027 update : 정리해뒀던 내용이 잘못된 해결 방법이라 수정하였다.
- 파일 이름이 한글인 경우 아래와 같은 경고 문구가 발생했다.
The HTTP response header [Content-Disposition] with value
[attachment; filename="픽셀링크-이미지.png"]
has been removed from the response because it is invalid

java.lang.IllegalArgumentException:
The Unicode character [픽] at code point [54,589]
cannot be encoded as it is outside the permitted range of 0 to 255

- 웹 브라우저에서 네트워크 탭에서 요청 내역을 보면 HTTP response header [Content-Disposition] 항목에 아무 내용도 출력되지 않는다.

- 이런 문제는 파일 이름이 시스템이나 DB, 코드 등에서 허용하지 않은 문자 인코딩 범위를 벗어날 때, 즉 파일 시스템이 지원하지 않는 문자 인코딩 형식때문에 발생한다고 한다.
- 해결 방법 중 하나는 GET 요청이 들어왔을 때 Response Header의
Content-Disposition에 한글로 저장된 파일 이름을 작성해서 보내줄 때 UTF-8로 변환하는 방법이 있다.- 이전에 다른 실습에서도 UTF-8 설정을 진행했었는데, 이번 파일 업로드는 참고 자료를 그대로 따라하면서 UTF-8 설정을 넘기다보니 발생한 것 같다.
FileController의 GET 메소드에서URLEncoder를 사용하여 한글 파일 이름으로 UTF-8로 변환한다.- 또한
attachment; filename*=UTF-8속성을 사용해서 UTF-8 인코딩을 명시해둔다.
- 또한
@RestController
@RequestMapping("file")
@RequiredArgsConstructor
public class FileController {

    private final FileService fileService;

    // GET
    // 파일 다운로드하기
    @GetMapping("/download/{id}")
    public ResponseEntity<ByteArrayResource> download(@PathVariable("id") String id) throws IOException {
        LoadFile loadFile = fileService.downloadFile(id);
        String filename = URLEncoder.encode(loadFile.getFilename(), StandardCharsets.UTF_8.toString());

        return ResponseEntity.ok()
                .contentType(MediaType.parseMediaType(loadFile.getFileType()))
                .header(HttpHeaders.CONTENT_DISPOSITION, "attachment; filename*=UTF-8\""+filename+"\"")
                .body(new ByteArrayResource(loadFile.getFile()));
    }

    // POST
    // 파일 업로드하기
    @PostMapping("/upload")
    public ResponseEntity<?> upload(@RequestParam("file") MultipartFile file) throws IOException {
        // 응답의 body에 파일 id를 넣어 전송
        return new ResponseEntity<>(fileService.addFile(file), HttpStatus.OK);
    }

}
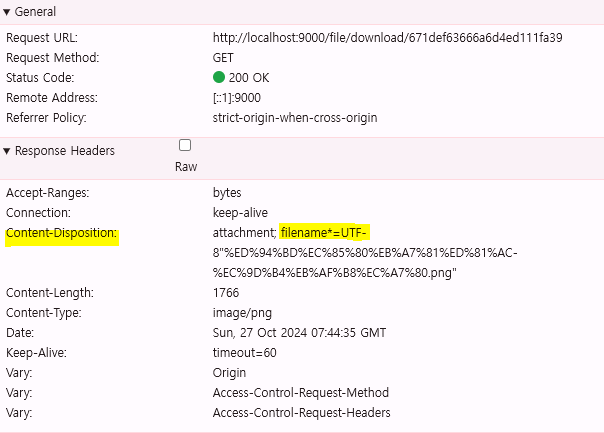
- 어플리케이션을 다시 실행한 후 한글 이름으로 된 파일을 업로드한 뒤 웹 브라우저에서의 요청과 서버 터미널을 확인한다.
- 수정 후엔 Response Header에 Content-Disposition 항목이 잘 뜨며, 한글이 UTF-8로 변환되어 있는 것을 확인할 수 있다.